Tuesday, 15 July 2014

Summer Cocktails: Kiwi Blueberry Mojitos

As previous service-industry workers, there are some drinks that are a little bit of a pain to make during a rush like cappuccinos, matcha lattes and mojitos. At the same time, we LOVE summer cocktails because they're really refreshing. The bonus bit about making your own cocktails is that you don't have to really scrimp   measure alcohol, or any of the ingredients for that matter, and it costs a lot less. The ingredients here are an estimate that has worked for us, but feel free to change to suit your palettes.

Here's a recipe that yields 4-6 tall glasses (1 pitcher) of the kiwi blueberry mojitos:

Ingredients:
200-250g blueberries (one medium pack at the grocery, or 2 cups frozen)
8 kiwis
mint (for garnish.. but very important in mojitos)
1/4 cup lime juice (that's about 3-4 limes)
1/2 cup sugar and a little more (1 tbsp) for the rims
1.5 cups sparkling water (tonic water)
ice cubes
rum (dark/light) - amount varies

Procedure:

  1. Peel 5-6 kiwis, squeeze lime juice, add 1/2 cup sugar and puree in a blender. Add as much rum as required (to taste)
  2. Set aside 2-3 sliced kiwis
  3. Gently crush the blueberries and set aside
  4. Prepare the glasses by moistening the rims with a slice of lime and running the moist rims against the 1tbsp of sugar on a plate
  5. After the rims are moistened, place ice, 1-2 slices of kiwi and some blueberries in the glass. Add the puree from step (1) until about the halfway point, and use sparkling water the rest of the way. Add mint to the top for garnish. Stir and enjoy!
The final product - refreshing, fruity summer cocktails 

Mojitos are more often than not, worth the effort


And remember folks, hammer and potato do not support drinking and driving!


Sunday, 22 June 2014

High Tea Saturday Part 3: Prosciutto Gruyere Parmesan Scones

At last! The final recipe we used for our High Tea Saturday series (here are links to part 1 and part 2). This was our first time making savoury scones and they turned out to be a pretty cheesy success. They also turned out to be breakfast for the next two days--easy to warm up by sticking them in the toaster while the coffee is brewing.

We would like to give credit to the original recipe, found here

Ingredients: 
2.5 cups all-purpose flour
2 tablespoons granulated sugar
1 tablespoon baking powder
1 teaspoon salt
1/2 cup butter
2 large eggs
2/3 cup buttermilk
2/3 cup grated gruyere (we don't really measure cheese. we may have added a bit more)
1/2 cup chopped prosciutto (again, we may have added a bit more)
1/4 cup grated parmesan
1/4 cup chopped green onion (we may have used less. not a big fan of these)
2 tablespoons half and half

Procedure: 

  1. Whisk flour, sugar, baking powder and salt. Chop up the butter and slowly add to the mixture until crumbly (use your hands.. just because it's fun!)
  2. Add the eggs and buttermilk and whisk together
  3. Add the cheeses, onion and prosciutto and mix until the dough is sticky
  4. Find a clean and flat surface. Flour the surface and knead until all ingredients are evenly combined. 
  5. Roll the dough flat until it is about 0.5-1 inch thick and cut into fun shapes (like triangles. triangles are pretty fun)
  6. Line a baking sheet with parchment paper and place the scone triangles. (The original recipe yielded about 10 scones but we used our amazing tetris skills to get more scones out of the surface area of out baking sheet and yielded a little above 15 triangles of different sizes. with a bit of space in between each scone as room for expansion)
  7. Lightly brush batter with half and half cream and sprinkle with additional salt/cheese
  8. Chill in the freezer for half an hour and preheat the oven to 400F
  9. Bake for 20 minutes or until golden brown at the top. Best served with some tea (this isn't high tea without the tea, folks!) 
These scones look quite photogenic

The final product: Different sizes of scones loaded up with all the things we love--cheese and prosciutto. Notice all that ham sticking out of that middle scone. /happiness

Monday, 5 May 2014

High Tea Saturday Part 2: Tomato Basil Mushroom Quiches

Sorry for the delayed post folks! Part 2 of our High Tea Saturday Adventure, consisted of some delicious Quiches! Quiche is one of those recipes that are made differently by everyone and differently every time it is made. The great thing about quiche is that it's so versatile and customizable! You can put practically anything you want in it. In our version of Quiche, we added tomatoes, mushrooms and some fresh basil.

Tomato, Basil and Mushroom Quiche
Ingredients:
Phyllo pastry
Tomatoes
Mushrooms
Basil
Eggs
Seasoning

Procedure:
  1. Preheat oven to 350F.
  2. Cut your phyllo pastry into little squares and place over each well in your muffin tin. Make sure the squares of phyllo are big enough that they hang a little past the edges of the wells in the muffin tin.
  3. Prep and chop your tomatoes, mushrooms and basil into bite sized pieces.
  4. In a separate bowl, beat your eggs and add in your tomatoes, mushrooms and basil and your seasoning of choice to taste. For seasoning, we used salt, pepper, garlic powder and oregano and thyme.
  5. Carefully pour your filling into each phyllo pastry cup.
  6. Bake at 350F for 25-30 minutes or until toothpick comes out clean.
It is important to note that the reason why we didn't specify any exact measurements is because the amount of ingredients you use will depend on how many quiches you want to make, so we recommend just eyeballing the amount of ingredients you want to use. We made about a dozen mini quiches that day. Additionally, you can put almost anything in your quiches! We recommend getting creative! Suggestions could be some cheddar cheese (or any cheese of choice), bacon, pepper, garlic etc. The sky's the limit with Quiche!

Fresh baked mini quiches, straight out of the oven
Quiche is so simple and easy to make, yet it's packed with flavour and deliciousness! Give this refreshing twist on eggs a try!

Saturday, 3 May 2014

Red Velvet Cheesecake Brownies

Red Velvet is one of those classic flavours that many of us are familiar with now. Red Velvet cupcakes are a staple in our kitchens (stay tuned!) and we're always trying to find new ways to make that more exciting. Today we decided to experiment with our good ol' Red Velvet cupcake recipe and turn it into something lighter, hence Red Velvet Cheesecake Brownies were born!

Ingredients:
Yield: 16 brownies

Red Velvet Brownie:
1/2 cup of unsalted butter (softened at room temperature)
1 cup white sugar
1/4 tsp salt
2 eggs
3/4 cup flour
4.5 TBSP cocoa powder
1 tsp distilled white vinegar
1 tsp vanilla extract
Red food colouring

Cream Cheese Layer:
1 250g package of cream cheese
1 egg
4.5 TBSP white sugar
1 tsp vanilla extract

Procedure:
  1. Grease a 9x9 baking pan with butter or non-stick cooking spray. Cut some parchment paper out, and lay the parchment paper on the greased pan.
  2. Preheat oven to 350F
  3. Cream together butter and sugar. Once creamy and smooth, add the eggs and beat well. Add the cocoa powder and make sure it is well mixed. Add the salt, followed by the food colouring and vinegar. Make sure to mix between adding each ingredient. Add the flour last and just mix until everything is combined and well incorporated
  4. Reserve a little bit of the batter (1/4 cup will do) and put it in a bowl aside
  5. Pour the rest of the batter into the prepared baking pan
  6. Cream the cream cheese, egg, sugar and vanilla extract until well mixed. (Note: make sure the cream cheese is completely softened in order to avoid lumps in your cheesecake layer)
  7. Pour the cream cheese mixture on top of the red velvet brownie mixture and smooth out to the edges
  8. Using a spoon, dollop the remaining red velvet batter you put aside on top of the cream cheese.
  9. Using a butter knife or toothpick, swirl the batter into the cream cheese miture.
  10. Bake for 30-35 minutes at 350F (or until inserted toothpick comes out clean)
  11. Make sure brownies are completely cool, cut and serve!
Note: It's best to make use of red food colouring PASTE (if you have it) as it will give you a richer and brighter red colour. We, however, didn't have any and made use of the regular liquid food colouring and they still turned out quite red, we just had to add a bit more until they were the colour we wanted. The amount you use is up to you and how bright or dark you want the red to be. Alternatively, you could also just leave out the food colouring all together if desired.

Red Velvet Cheesecake Brownies
These brownies are a delicious and "lighter" twist on the classic red velvet cake/cupcake. They're fudgey, moist and very reminiscent of a red velvet cupcake (minus all the overly sweet calorie filled icing!) They are quick and easy to prepare, and will disappear before your eyes! Give this recipe a try, for when you're next craving the classic Red Velvet!

Sunday, 2 February 2014

High Tea Saturday Part 1: Smoked Salmon Tea Sandwiches

One fine Saturday, we had decided to try out hand at some of our high tea recipes because we felt fancy  like we wanted to have lots of some English food. In this three-part series, we'll be sharing our adventure with three of our favorite high tea items - savoury style. For our first recipe, we made some simple tea sandwiches. This recipe is highly fuss free and will need the following:

Ingredients: 
1 package smoked salmon from the deli (normally 100-300 grams, depending on how many sandwiches you want)
1 small block of cream cheese (250g)
fresh dill to taste
1 loaf of rye bread (preferably square shaped)

Process: 


  1. Remove the crusts from the bread and cut into square pieces 
  2. In a mixing bowl, combine the dill and the cream cheese until the tart taste of the dill flavours the cheese. Mix until the cheese has the consistency of a spread 
  3. Tea sandwiches in the making!
  4. Take two slices of bread and spread with a cream cheese layer. On one slice, add a few slices of smoked salmon (based on our package, 1-1.5 round pieces) and then cover with the other slice of bread (basically, combine all ingredients to make a sandwich). 

The finished product. We may or may not have gobbled the entire plate down. 


Sunday, 26 January 2014

Dineout Vancouver 2014 Part 2: Chambar

This post is part 2 of our Dineout Vancouver series this year. If you haven't checked out our previous post, which includes a little blurb about what Dineout Vancouver is, you can find it here . This Dineout adventure takes us to Chambar ($38), a Belgian-inspired restaurant near crosstown (or the Stadium skytrain station).

We started off with two appetizers from their dineout menu and a side of Belgian poutine. The cauliflower soup and gambas played well, with generous portions. The gambas were unexpectedly not spicy and full of garlic as their Spanish counterparts, but the bits of chorizo were nice. Below is a picture of the poutine which we recommend because it's delicious and not as heavy as poutine normally is. It is taken beside their Earl Grey cocktail, which is basically tea-infused alcohol with what we understood was some Italian aperitif/digestif. 
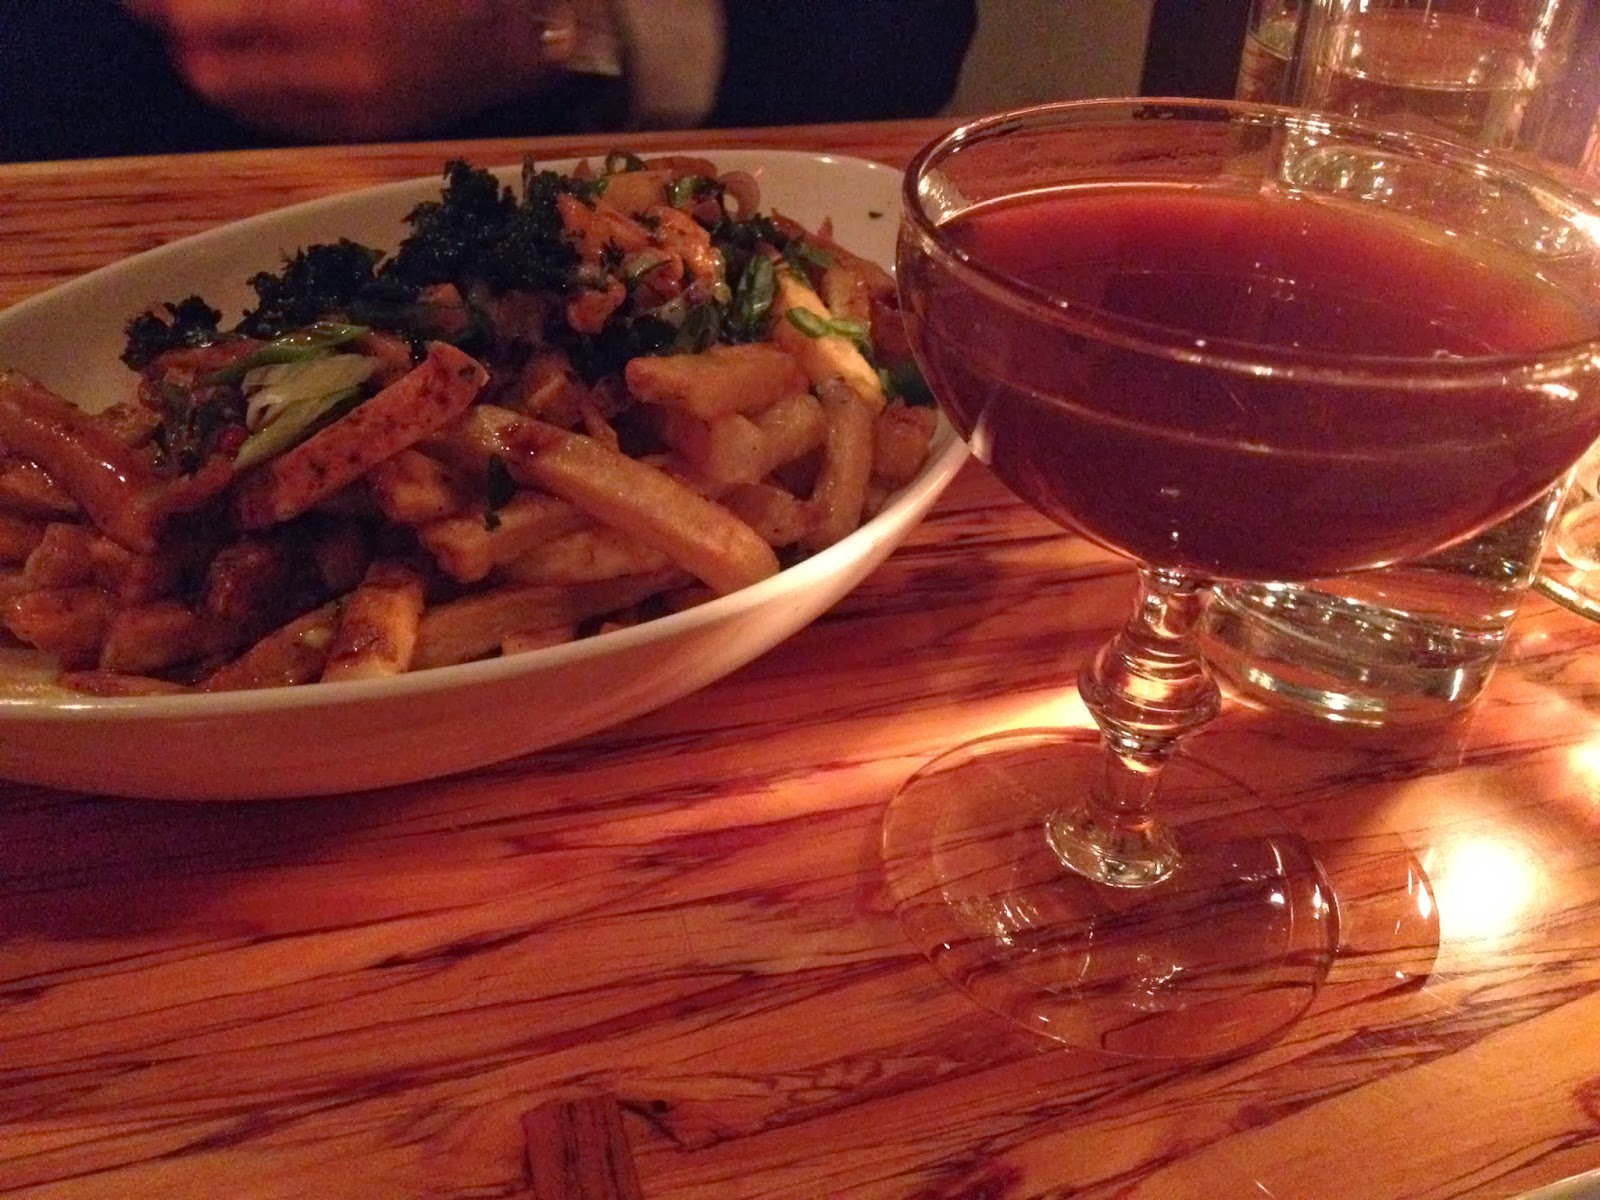
Belgian poutine and an Early Grey cocktail

Cauliflower soup 
For mains, we went with the spiced rubbed duck breast with chestnut hummus, Brussels sprouts, pistachios and wild berry compote, a twist to what's normally offered on the regular menu. We also had the steelhead trout with swiss chard, shaved zucchini, meyer lemon, parsnip puree and mustard sauce. It's hard to pick a favorite because the flavors of the two were very different. We also regret not having room for the mussels, because Chambar mussels are also highly recommended and delicious. 

The trout (aka Duo de truite)

Spiced duck breast! 

What is interesting about this Dineout experience was that it left a dessert option for people that don't like dessert. We ended up with the coconut raspberry pannacotta (sweet..), which is served with a green apple sorbet, and the cheese plate (savoury!) which featured brie, blue and cheddar cheeses, each with a corresponding "sauce" (tomato jam, balsamic reduction, etc) and crostini. The pannacotta had a very smooth texture and is less gelatinous but is paired well with the sorbet which is tart. Our favorite cheese was the cheddar paired with the tomato jam because it really brought out the "cheesiness" of the aged cheddar.

Raspberry pannacotta and green apple sorbet

cheese plate 


The Chambar experience left for very happy stomachs and it would be a great place to have a nice dinner on occasion (we forgot to mention the eclectic background music and a good drink selection apart from what's featured here). This is our last post in our Dineout Vancouver 2014 series. We'll be back in the kitchen soon!


Cheers! 

Thursday, 23 January 2014

Dineout Vancouver 2014 Part 1: Baru Latino

January is a special time of the year for Vancouver food lovers. Come mid-January the Dineout Vancouver Festival rolls around. It's during this time that the city enjoys 3 course meals for either $18, $28, or $38 at restaurants that would offer those same meals at a higher price for the rest of the year. We find it a good way to discover new eats or try things that don't normally fit in our "eating out" budget. Our first feature restaurant in 2014 is called Baru Latino, which is located in Point Grey/ Kitsilano close to the University of British Columbia.

Here's a look at their Dineout menu 

Baru Latino, from its name, is a Latin restaurant. Most Latin restaurants in town feature tapas, but Baru also has a solid lineup of Latin main courses and features Live Jazz on Monday nights. You can find their dineout menu here .

Ecuadorian Ceviche

Beef Tiradito

We ordered two kinds of appetizers. The Ecuadorian ceviche uses less fish and more other seafood and is served with a root vegetable biscuit. Later on we found out they offer two other kinds of ceviche which is made very differently depending on the Latin region. We also had the Beef Tiradito - a Latin rendition of carpaccio.

Paella! 

We made a unanimous decision to both order the Paella -- because this might have been the first time we've had Paella since moving to Vancouver. This Paella felt very fresh - without all the oily stuff we were expecting. The rice is less sticky and it's less loaded with chorizo and chicken, but filled with a lot of good seafood. The Paella is also served in a plate in a sizeable portion that we didn't worry about overstuffing ourselves, thankfully we had room for dessert...

which we forgot to snapshot. The dineout menu doesn't give diners a choice on dessert, but it does not disappoint! The Latin flan (better known to us as Leche Flan) was nice, sweet, VERY creamy and is served with a berry compote on top and mango/raspberry puree on the side. We'll be tweaking our existing recipe in a future entry to achieve a less gelatinous and more creamy texture to replicate this so stay tuned! 

Overall, it was a good dining experience and we're likely to come back to either try the other types of ceviche or more of the tapas not offered in the Dineout menu. Cheers!